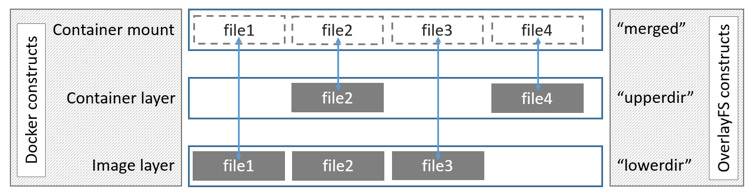
[root@localhost overlay2]# mount | grep overlay2 /dev/mapper/centos-root on /var/lib/docker/overlay2 type xfs (rw,relatime,attr2,inode64,noquota) overlay on /var/lib/docker/overlay2/0326c1da0af912a6ea5efda77b65b04e796993e0f111ed8f262c55b2716f1c08/merged type overlay (rw,relatime,lowerdir=/var/lib/docker/overlay2/l/ZJVMGTB2IOJ6QF57TYM5O7EWXW:/var/lib/docker/overlay2/l/QMKHIPSDT4JTPE4FLT7QGJ33ND:/var/lib/docker/overlay2/l/5PHT7S3MCZTTQOXVPA4CKJRRFD:/var/lib/docker/overlay2/l/HXATFASQ4E2JBG434DUEN54EZZ:/var/lib/docker/overlay2/l/WUZC5WSTQTPJUJ4KFAYCUT5IPD:/var/lib/docker/overlay2/l/MZUEUOFHBNVTRCJYJEG7QY4VWT,upperdir=/var/lib/docker/overlay2/0326c1da0af912a6ea5efda77b65b04e796993e0f111ed8f262c55b2716f1c08/diff,workdir=/var/lib/docker/overlay2/0326c1da0af912a6ea5efda77b65b04e796993e0f111ed8f262c55b2716f1c08/work)
func main() { runtime.GOMAXPROCS(1) arr := [10000]int{} for i:=0; i<len(arr); i++ { arr[i] = i } for _, a := range arr { go func() { fmt.Println(a) }() } for { time.Sleep(time.Second) } }
# Gitment # Introduction: https://imsun.net/posts/gitment-introduction/ gitment: enable: true mint: true # RECOMMEND, A mint on Gitment, to support count, language and proxy_gateway count: true # Show comments count in post meta area lazy: false # Comments lazy loading with a button cleanly: false # Hide 'Powered by ...' on footer, and more language: # Force language, or auto switch by theme github_user: kuring # MUST HAVE, Your Github ID github_repo: gitment-comments # MUST HAVE, The repo you use to store Gitment comments client_id: xxx # MUST HAVE, Github client id for the Gitment client_secret: xxxx # EITHER this or proxy_gateway, Github access secret token for the Gitment proxy_gateway: # Address of api proxy, See: https://github.com/aimingoo/intersect redirect_protocol: # Protocol of redirect_uri with force_redirect_protocol when mint enabled
执行hexo clean && hexo g && hexo s重新生成页面并在本地运行,可以看到gitment组件已经可以显示了,但是提示Error: Comments Not Initialized错误,点击login,然后允许认证,即可消除该错误。
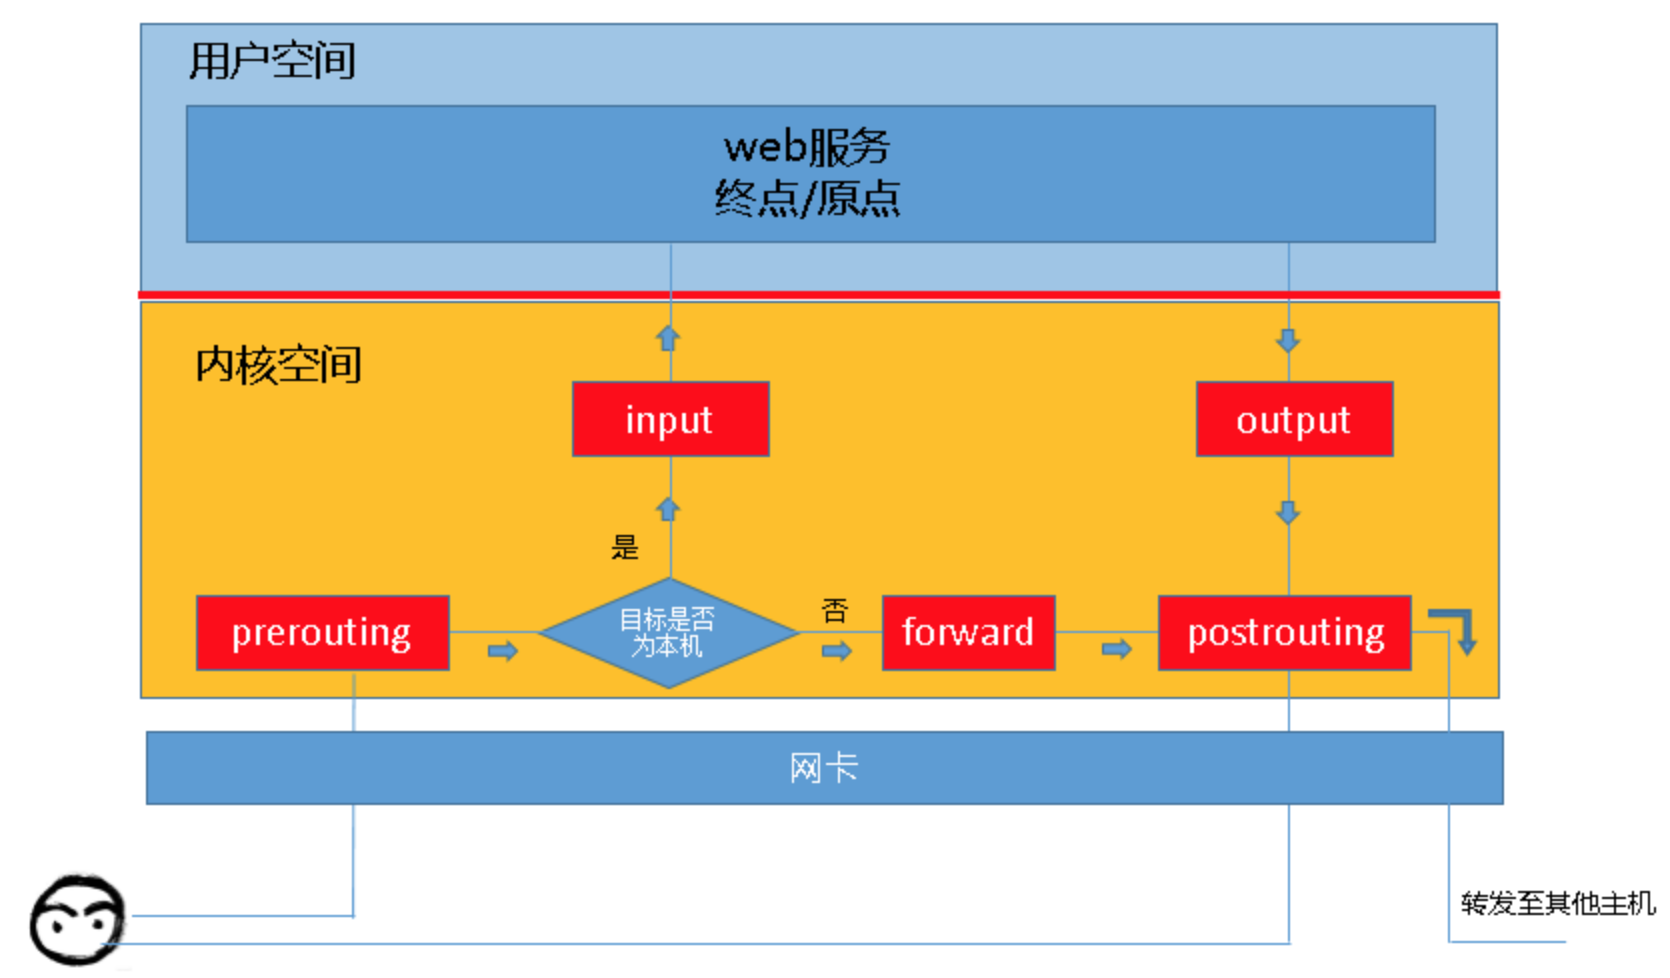
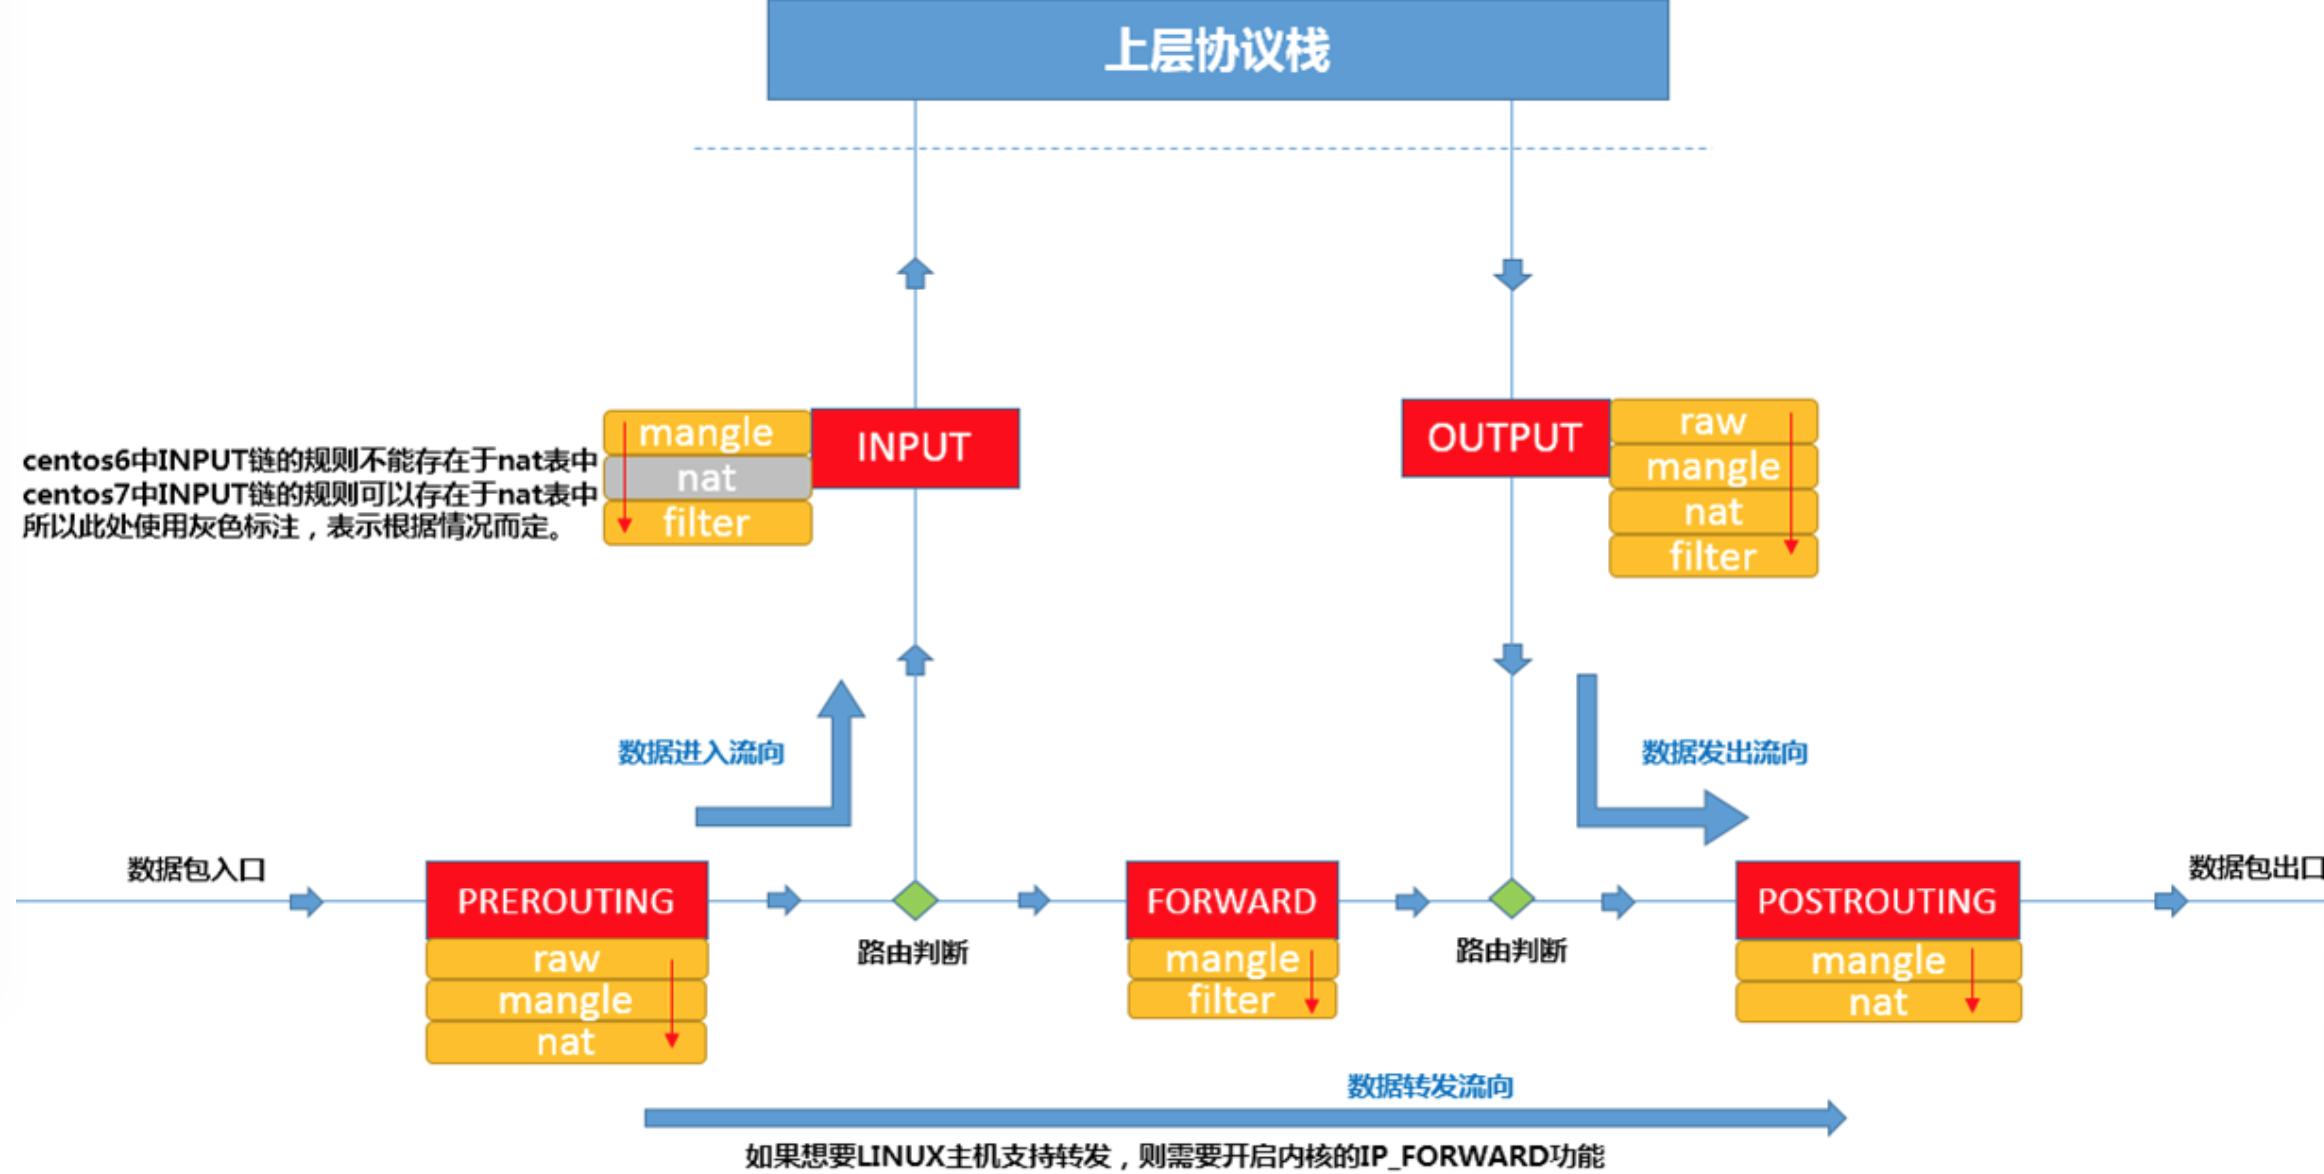
当一个网络包进入一台机器的时候,首先拿下 MAC 头看看,是不是我的。如果是,则拿下 IP 头来。得到目标 IP 之后呢,就开始进行路由判断。在路由判断之前,这个节点我们称为 PREROUTING。如果发现 IP 是我的,包就应该是我的,就发给上面的传输层,这个节点叫作 INPUT。如果发现 IP 不是我的,就需要转发出去,这个节点称为 FORWARD。如果是我的,上层处理完毕完毕后,一般会返回一个处理结果,这个处理结果会发出去,这个节点称为 OUTPUT,无论是 FORWARD 还是 OUTPUT,都是路由判断之后发生的,最后一个节点是 POSTROUTING。
“TRACE: tablename:chainname:type:rulenum “ where type can be “rule” for plain rule, “return” for implicit rule at the end of a user defined chain and “policy” for the policy of the built in chains.
环境清理,删除刚刚创建的规则即可,其中1为规则的编号:
1 2 3 4 5
# 可以通过此来查询之前创建的规则编号
iptables -t raw --line-number -nvL
# 删除规则
iptables -t raw -D PREROUTING 1
iptables -t raw -D OUTPUT 1
[database]
# You can configure the database connection by specifying type, host, name, user and password
# as separate properties or as on string using the url property.

# Either "mysql", "postgres" or "sqlite3", it's your choice
type = mysql
host = xx.xx.xx.xx:3306
name = grafana
user = dev
# If the password contains # or ; you have to wrap it with triple quotes. Ex """#password;"""
password = dev
#!/bin/sh
DB=$1
TABLES=$(sqlite3 $DB .tables | grep -v migration_log)
for t in $TABLES; do
    echo "TRUNCATE TABLE $t;"
done
for t in $TABLES; do
    echo -e ".mode insert $t\nselect * from $t;"
done | sqlite3 $DB